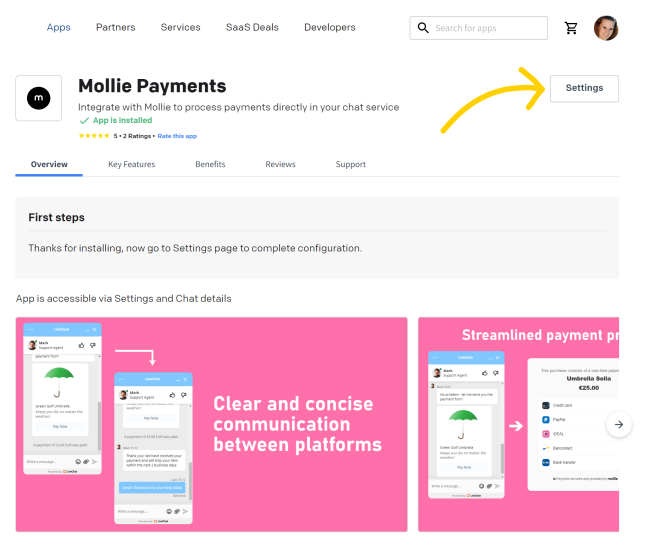
Connect Mollie with LiveChat to upgrade your service with an effortless payment process. Let your agents create subscriptions, set up one-time transactions, and answer questions quickly with access to order history, payment details, and transaction statuses.
Mollie Payments: Process transactions directly in LiveChat
Wojciech Pollok
Installation
1
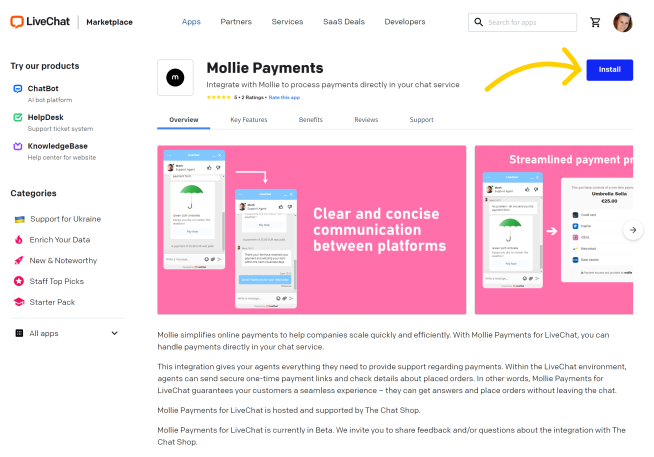
To install the Mollie Payments integration, enter the LiveChat Marketplace and select Install.
2
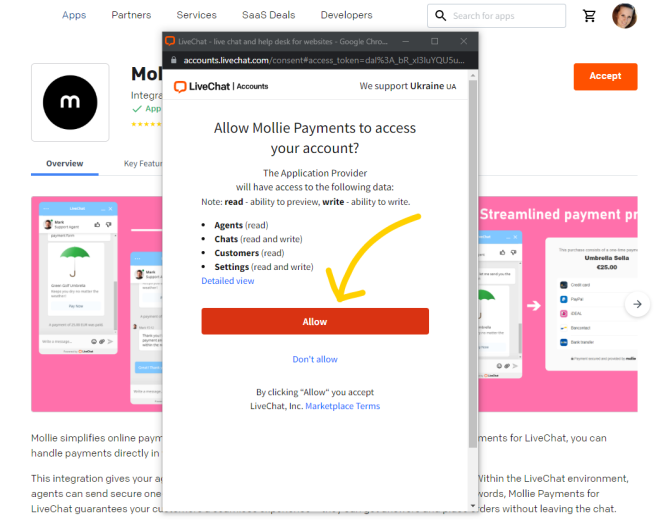
Accept app permissions.
3
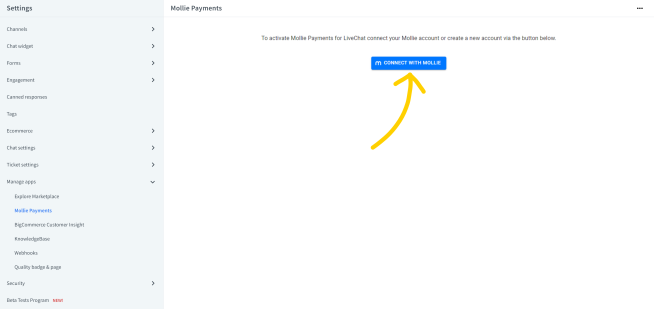
Select Settings.
4
Select Connect with Mollie.
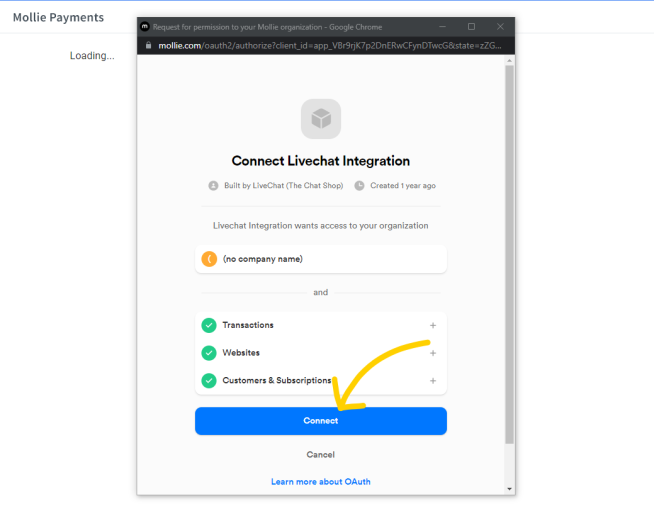
5
Log in with your Mollie credentials and select Connect.
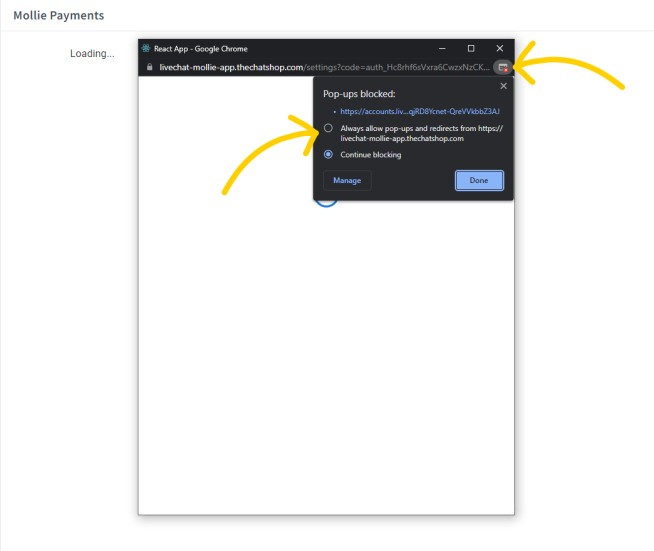
6
A “blocked pop-up” indicator will appear in the address bar → allow the pop-up to load.
7
Right-click on the empty pop-up and select Reload.
8
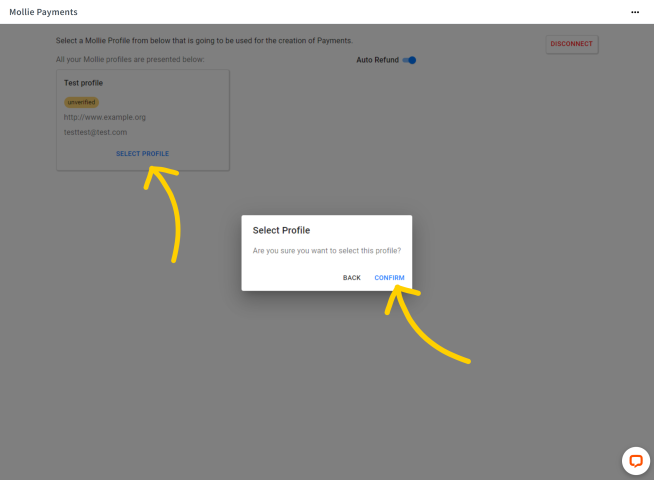
Select the Mollie Profile you’d like to use in LiveChat and confirm.
9
Decide if you want to disable the auto-refund option or keep it enabled.
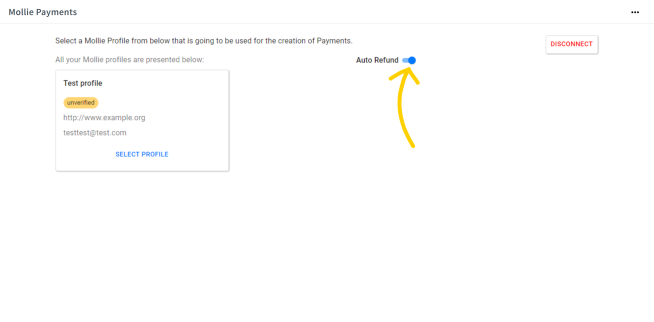
The auto-refund is responsible for refunding a confirmation payment of 1.00 (of any currency). The confirmation payment is collected to check if your customers’ credit cards are operational before charging the full amount.
The auto-refund is responsible for refunding a confirmation payment of 1.00 (of any currency). The confirmation payment is collected to check if your customers’ credit cards are operational before charging the full amount.
Set up a one-time payment
1
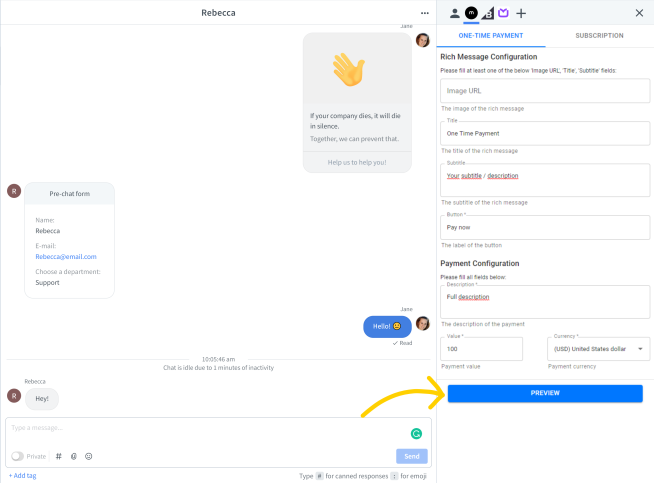
In an ongoing chat, navigate to the details column. Select the Mollie Payments icon to open the integration panel.
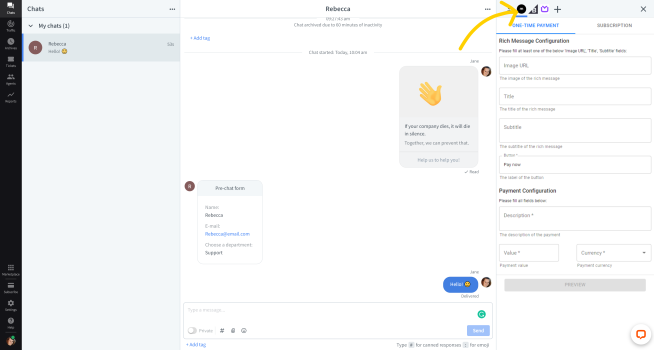
2
Select the One-Time Payment tab.
3
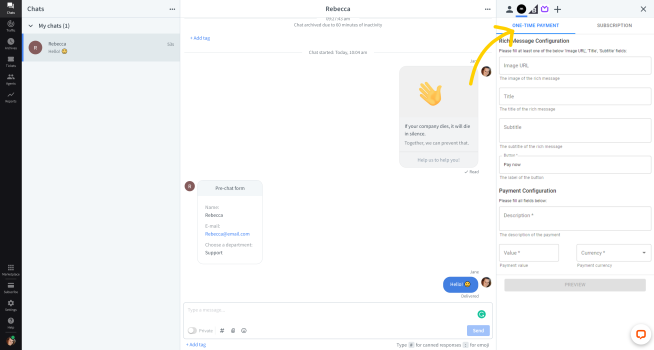
Fill out the Rich Message Configuration and Payment Configuration forms -> select Preview.
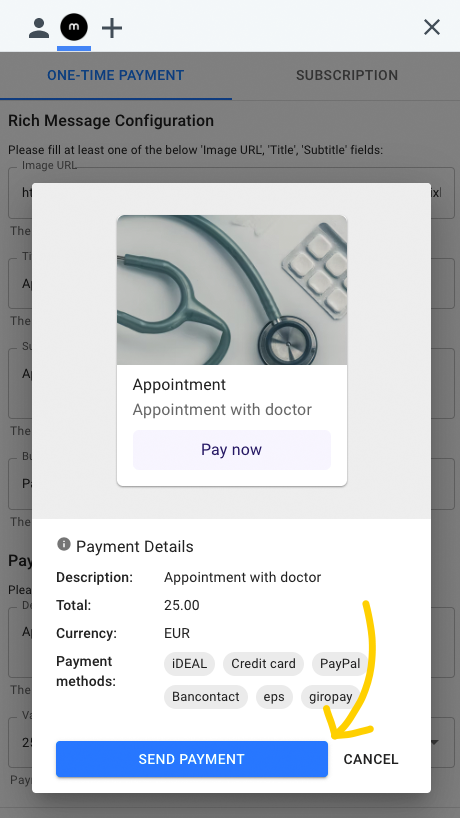
4
If the payment preview fits your needs, select Send Payment to share the payment rich message with your customer. Otherwise, select Cancel and fill out forms with the correct data.
5
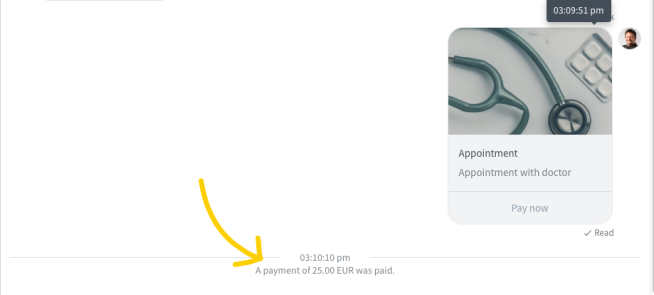
Once the customer has completed the payment, the transaction status will show up in the chat feed.
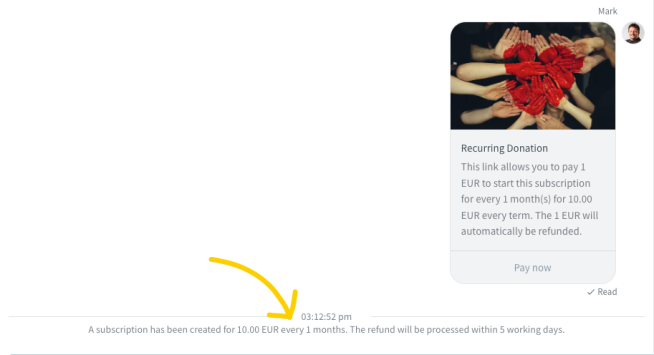
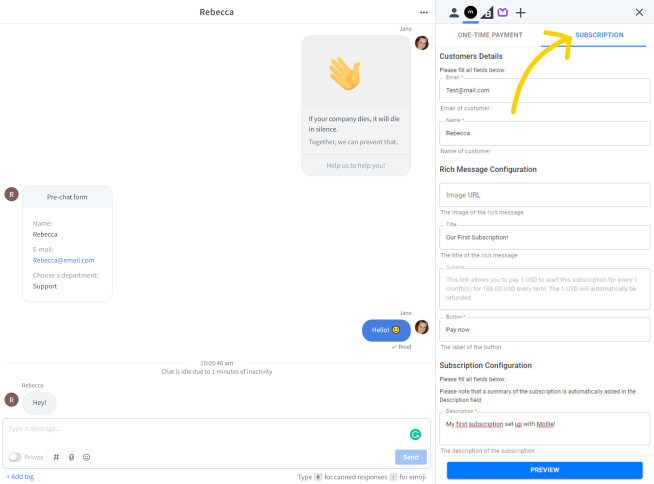
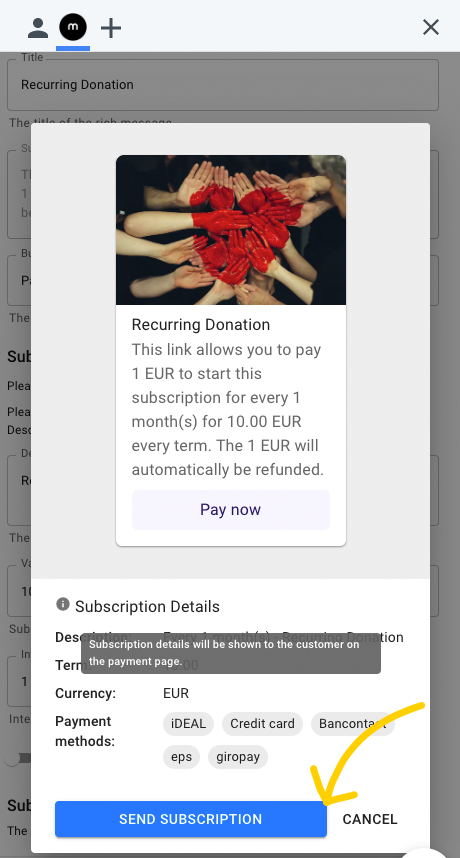
Create a subscription
1
In an ongoing chat, navigate to the details column. Select the Mollie Payments icon to open the integration panel.
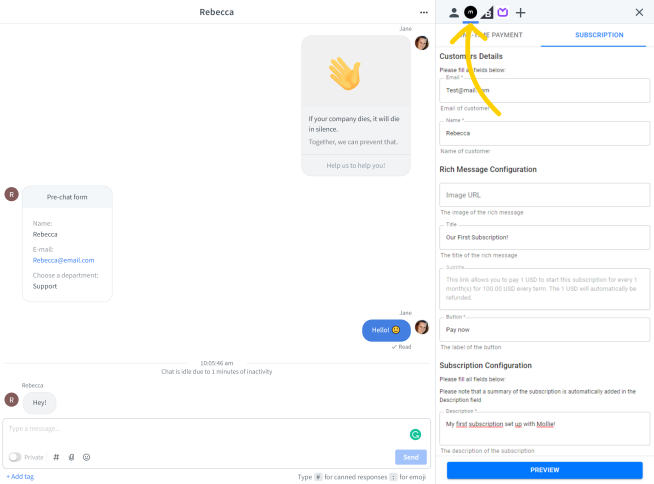
2
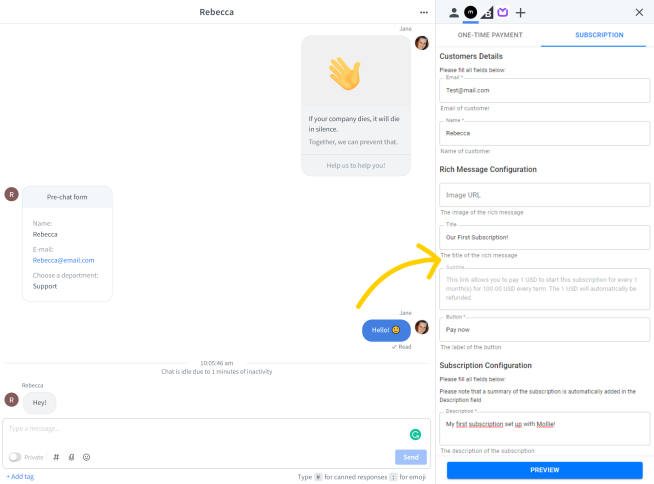
Select the Subscription tab.
3
Fill out the Customers Details, Rich Message Configuration, and Payment Configuration forms.
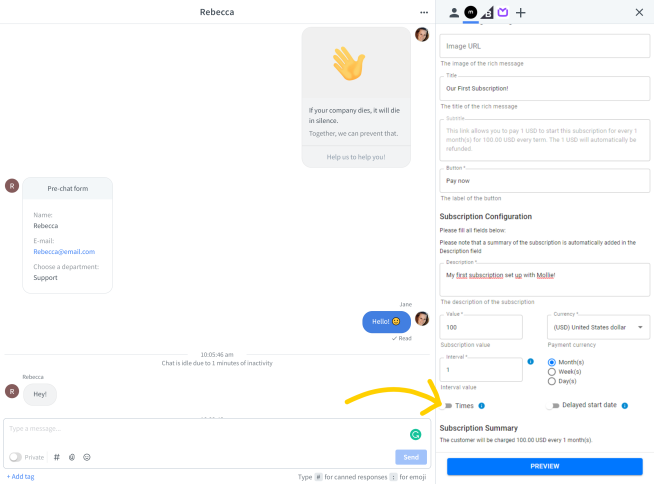
4
If you want to limit the subscription to a specific number of payments, enable the option Times and enter the number of payments you want to collect throughout the subscription.
5
If you want to choose a specific day for the subscription to start, enable the option Delayed start date and select the date.

6
Select Preview.
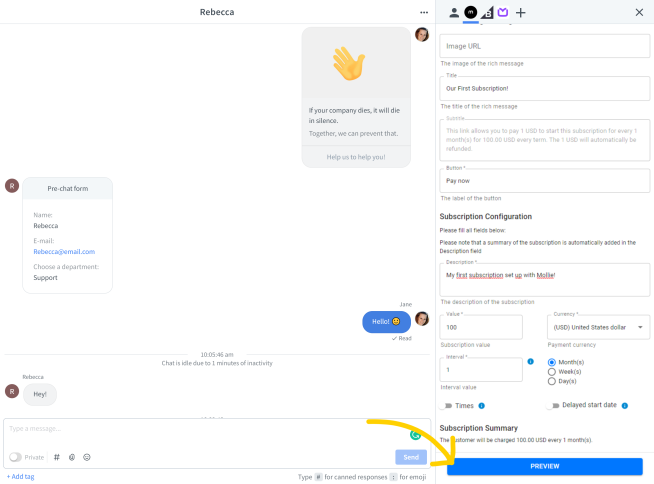
7
If the payment preview fits your needs, select Send Subscription to share the subscription rich message with your customer. Otherwise, select Cancel and fill out forms with the correct data.
8
Once the customer has completed the subscription setup, its status will show up in the chat feed.