A contact form on the website allows visitors to communicate with the site owner by sending direct messages. In HelpDesk, you can add a contact form on your website as another ticket source.
Creating a contact form is available in every HelpDesk plan.
How to create a contact form
If you want to create and add your contact form, go to the “Settings” section and choose the “Contact forms” category.
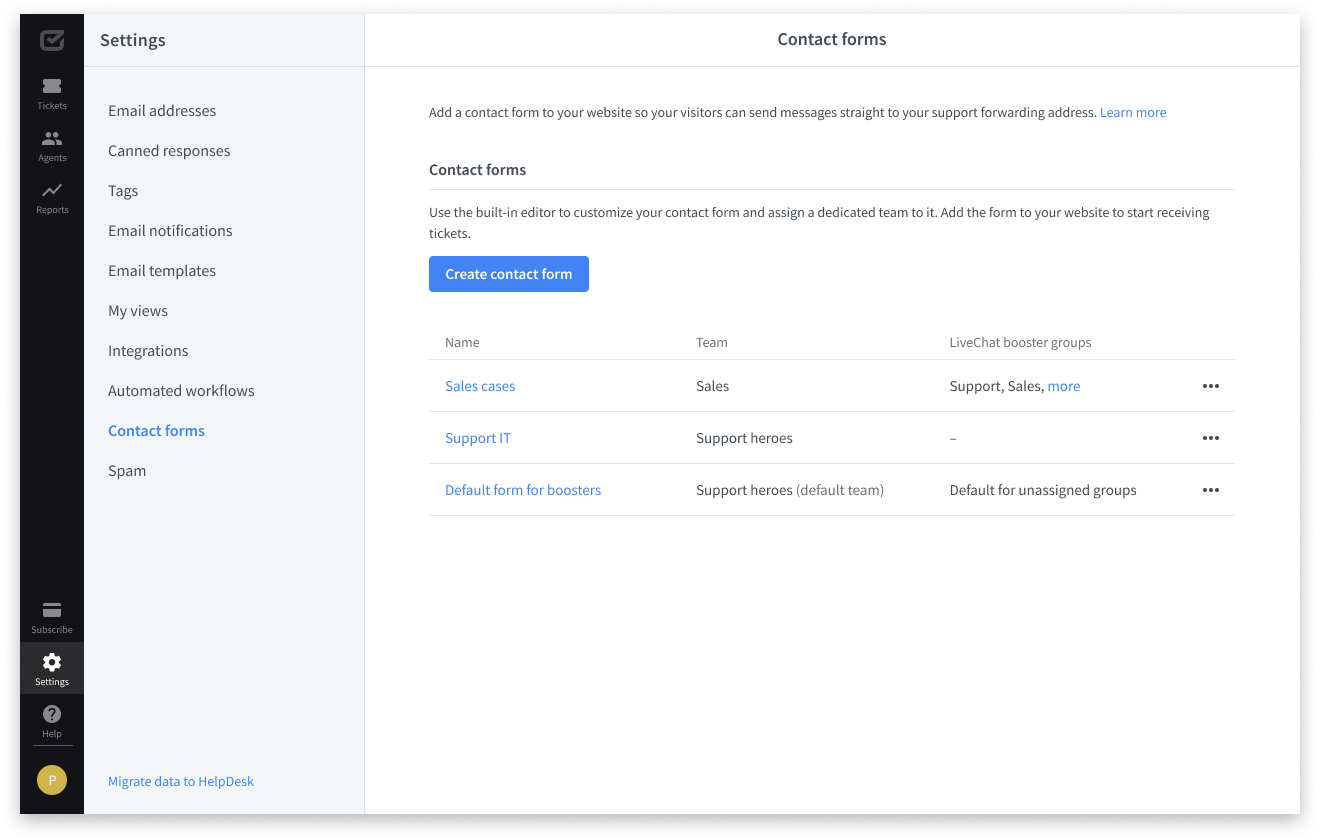
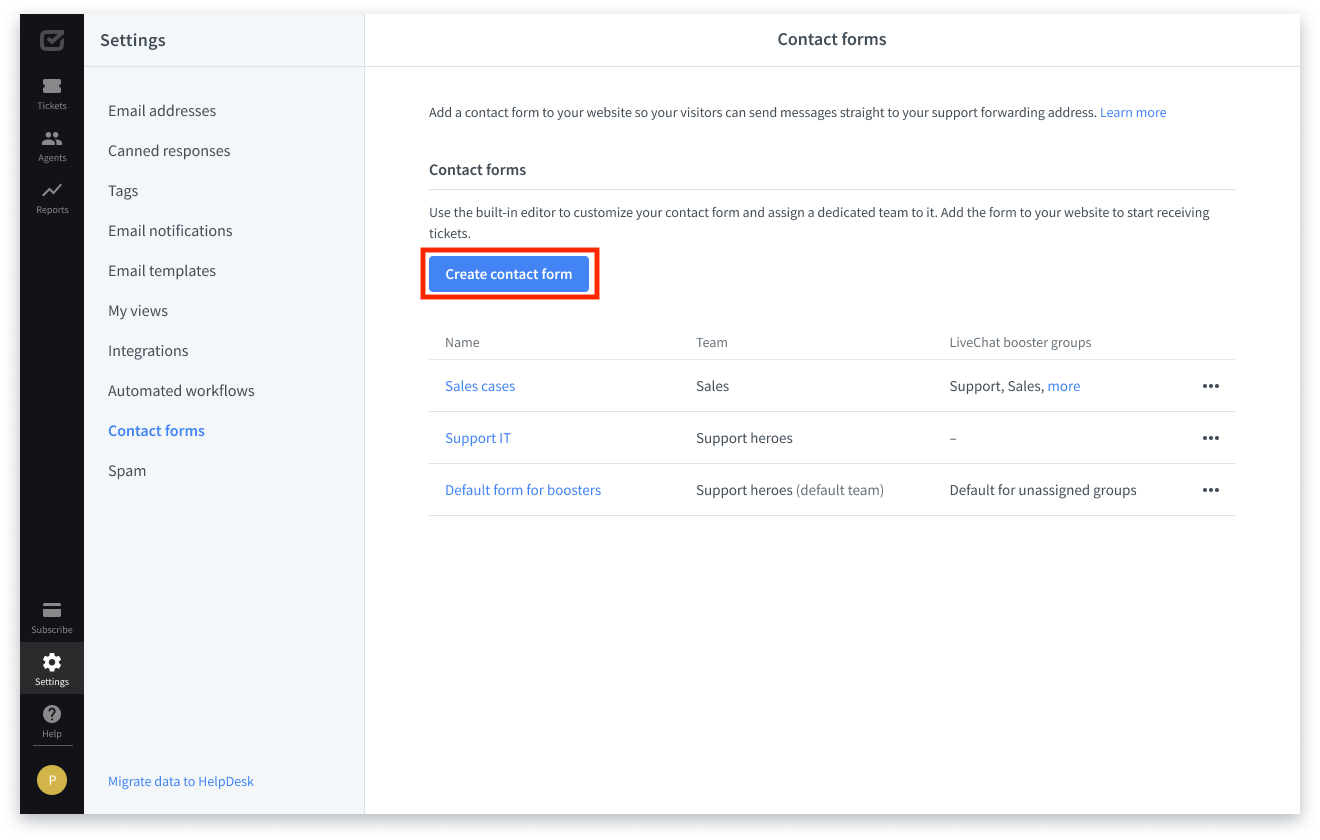
In the “Contact forms” settings category, click on the “Create contact form” button to create the form and then fully customize its details or assigned team.
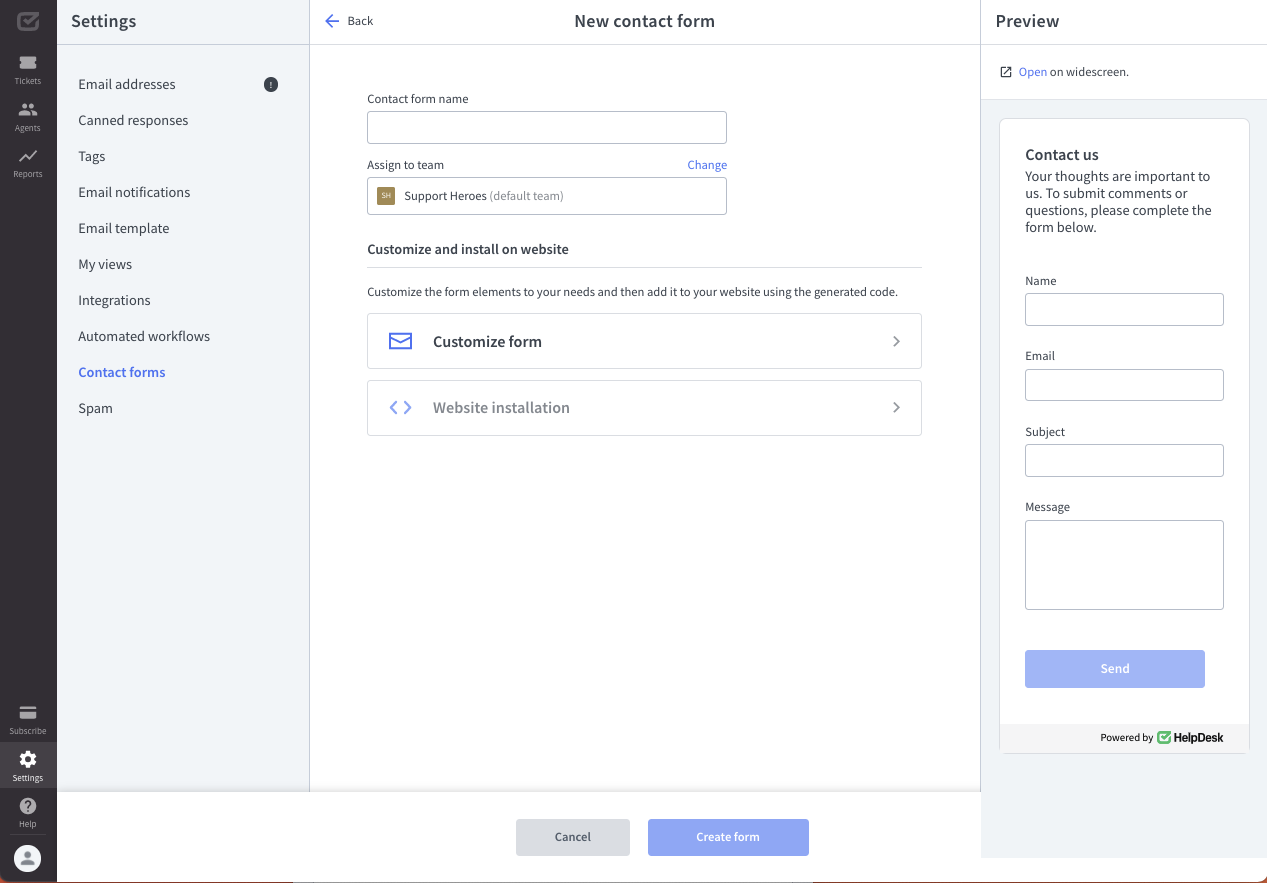
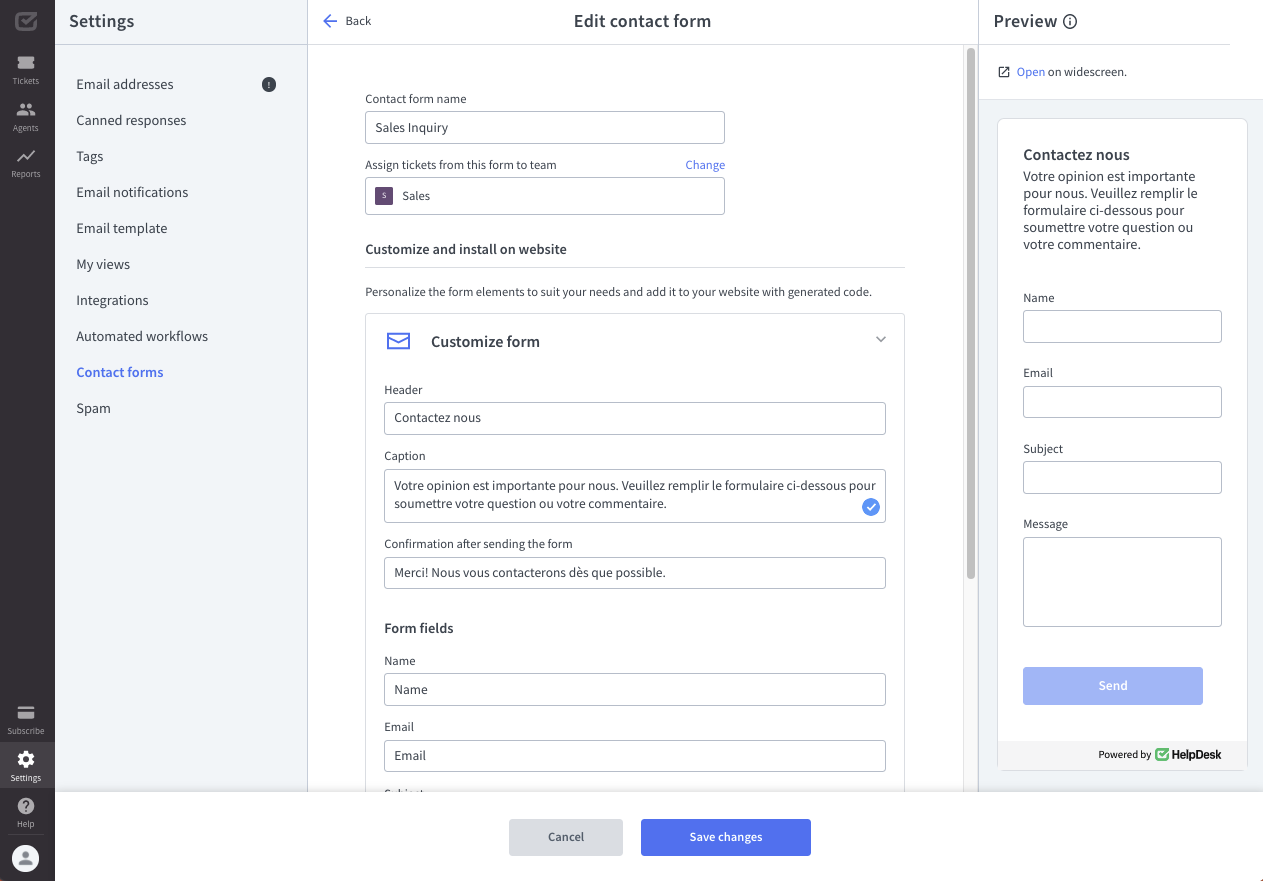
Now you can see the first settings of your new contact form. First, name your contact form to fit your goals, target site, or business needs. Then, select the team that will receive messages from the form. Also, note that you can decide which email address will be used as the reply address for the team.


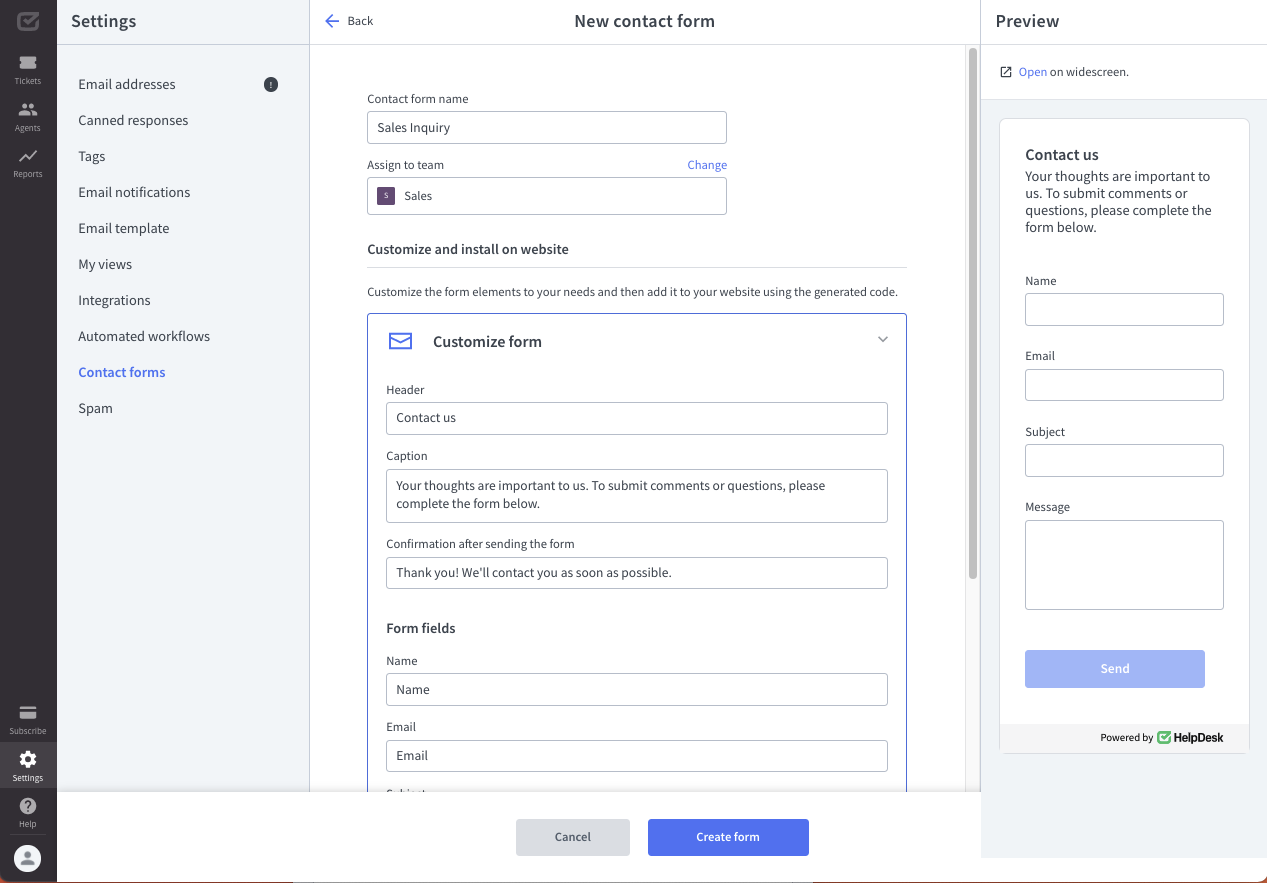
In this example, we used “Sales Inquiry” as the contact form name and assigned a sales team to handle all tickets from this particular contact form.
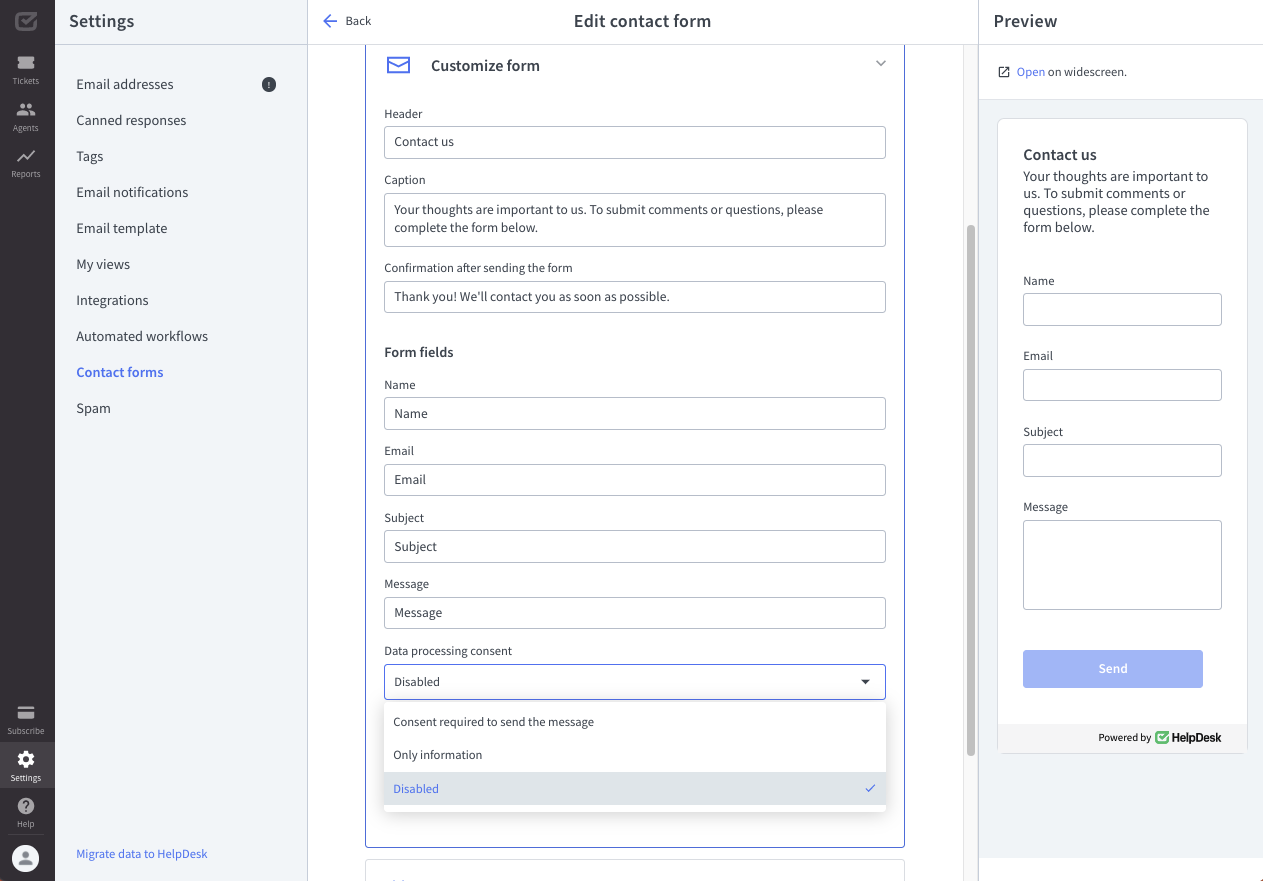
In the next step, you can customize the form elements. Expand the “Customize form” options.

Here, you can be creative and enjoy many customization options for your new contact form. First, adjust elements that describe the purpose of the contact form, such as:
- Header
- Caption
- Confirmation after sending the form
- Text on the button describing the action the visitor will perform
Next, decide on the names of the contact form fields that you want to collect from your website visitors, such as:
- Name
- Subject
- Message
- Data processing consent
Also, click on “Show more options” to open a list with elements dedicated to Error states or Validation messages.


The good thing is that we’ve made it easy for you to get started and pre-filled the contact form with texts. See if you find it helpful and add your changes to meet your needs.
Data processing consent
You can place a consent field in the contact form and adjust it with the appropriate text and links. Use this field for informational purposes or to obtain the recipient’s consent for data processing when sending the contact form.
You can see real-time changes to your contact form on the right in the “Preview” area. Still, you can click the “Preview” button to open the contact form on the widescreen, empathize with site visitors, and see what your contact form will look like.


When you’re ready with the customization, click on the “Create form” button.

You can edit, duplicate, or delete your contact forms at any time directly from your contact form list.
Use the “Duplicate” action to copy the entire content of the contact form you selected to reuse. This will save you a lot of time.
How to install a contact form
After the customization phase, it’s time to install the new contact form on your website.
Expand the “Website installation” instructions that you can find in the contact form settings.
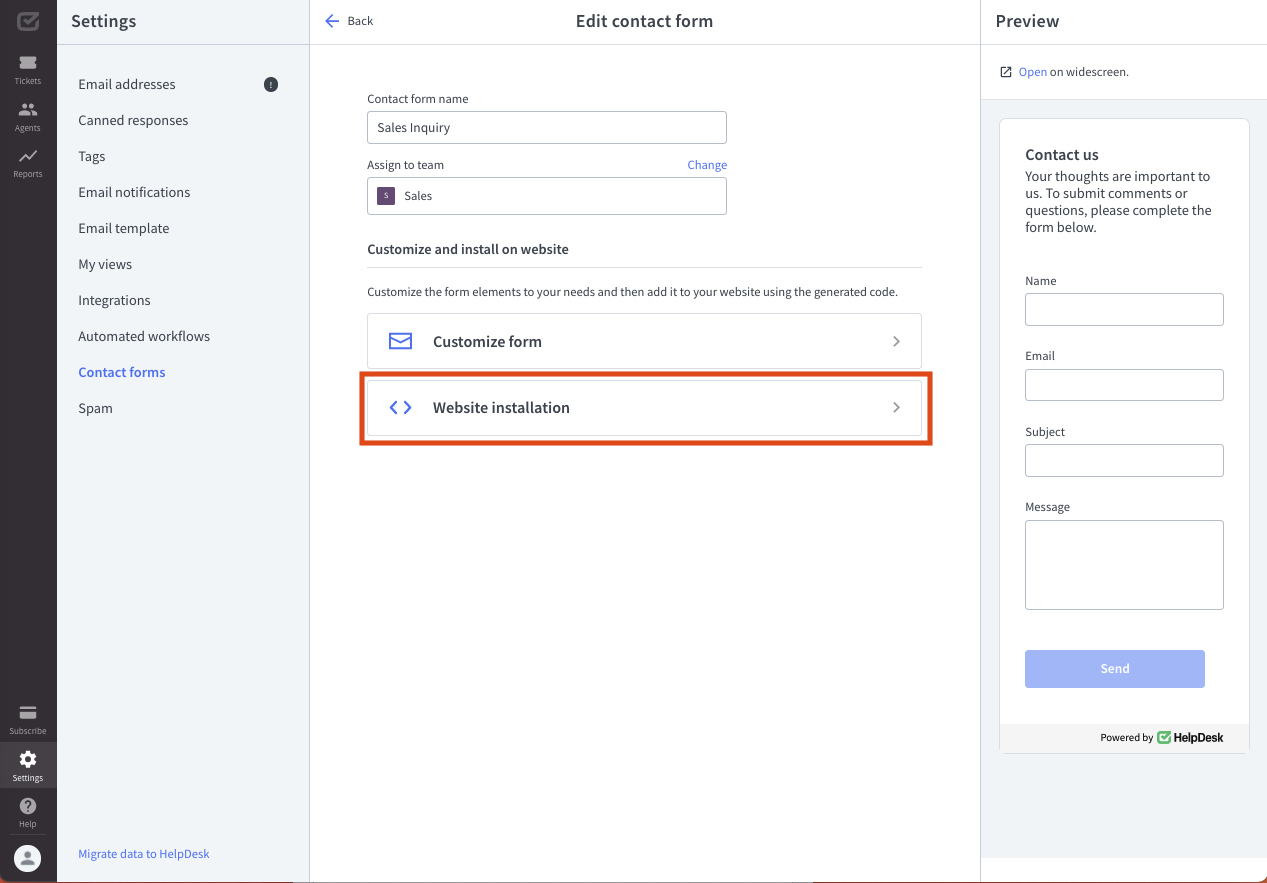
There you’ll find a specially generated installation code that was created based on your settings.

Click on the “Copy code” button. Then paste the copied code to embed the contact form on your website. Insert the code in a convenient place on your website, e.g., on the Contact page, About page, or footer.

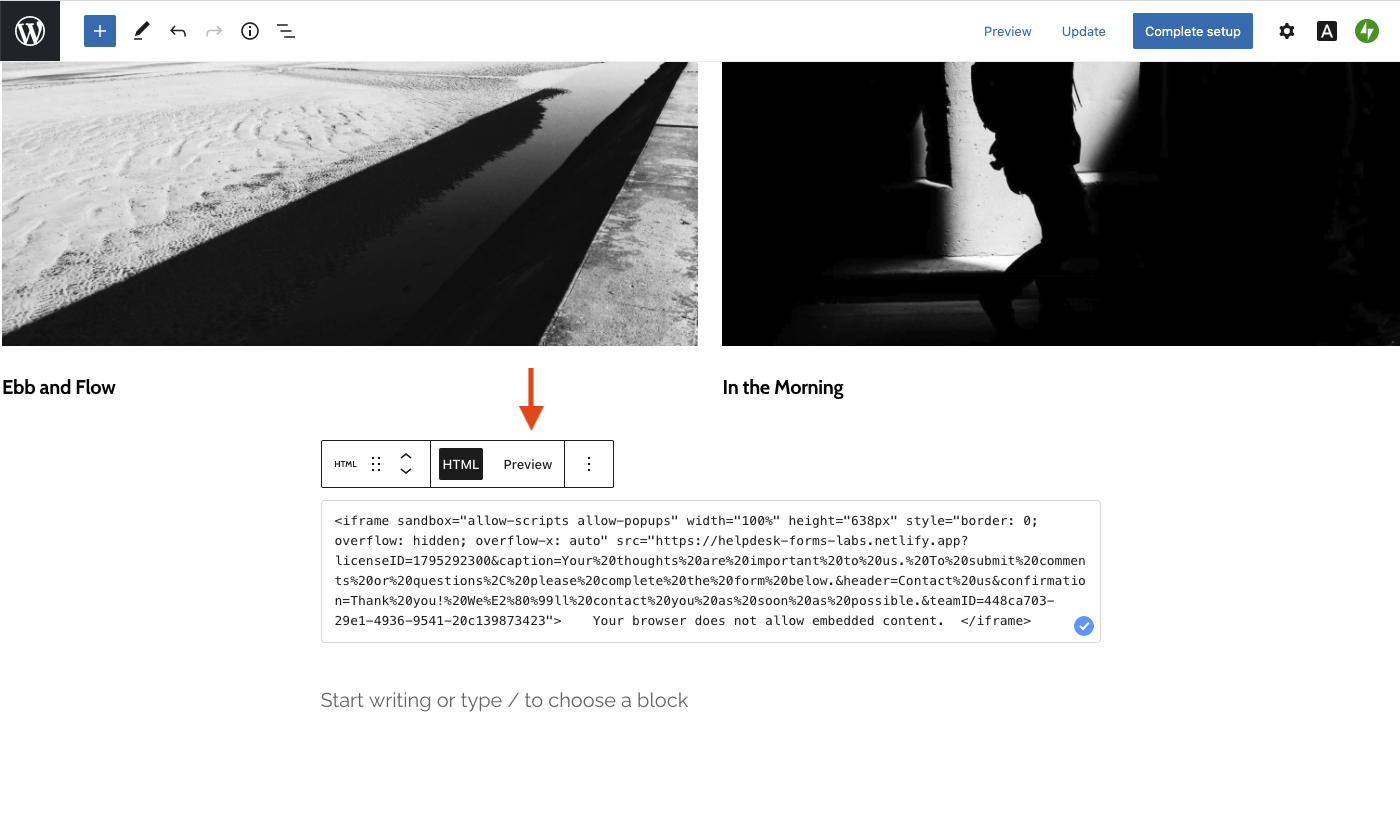
How to add a contact form on WordPress
To add the HelpDesk contact form, go to your WordPress account, and edit the website. Choose a place where you want to add a new block with a contact form.
You can find the HelpDesk contact form in the contact form settings.
Click on the “+” button to add a new block.

Scroll to the section with the widgets. Select “Custom HTML” block.

In this field, you can paste the generated HTML code.


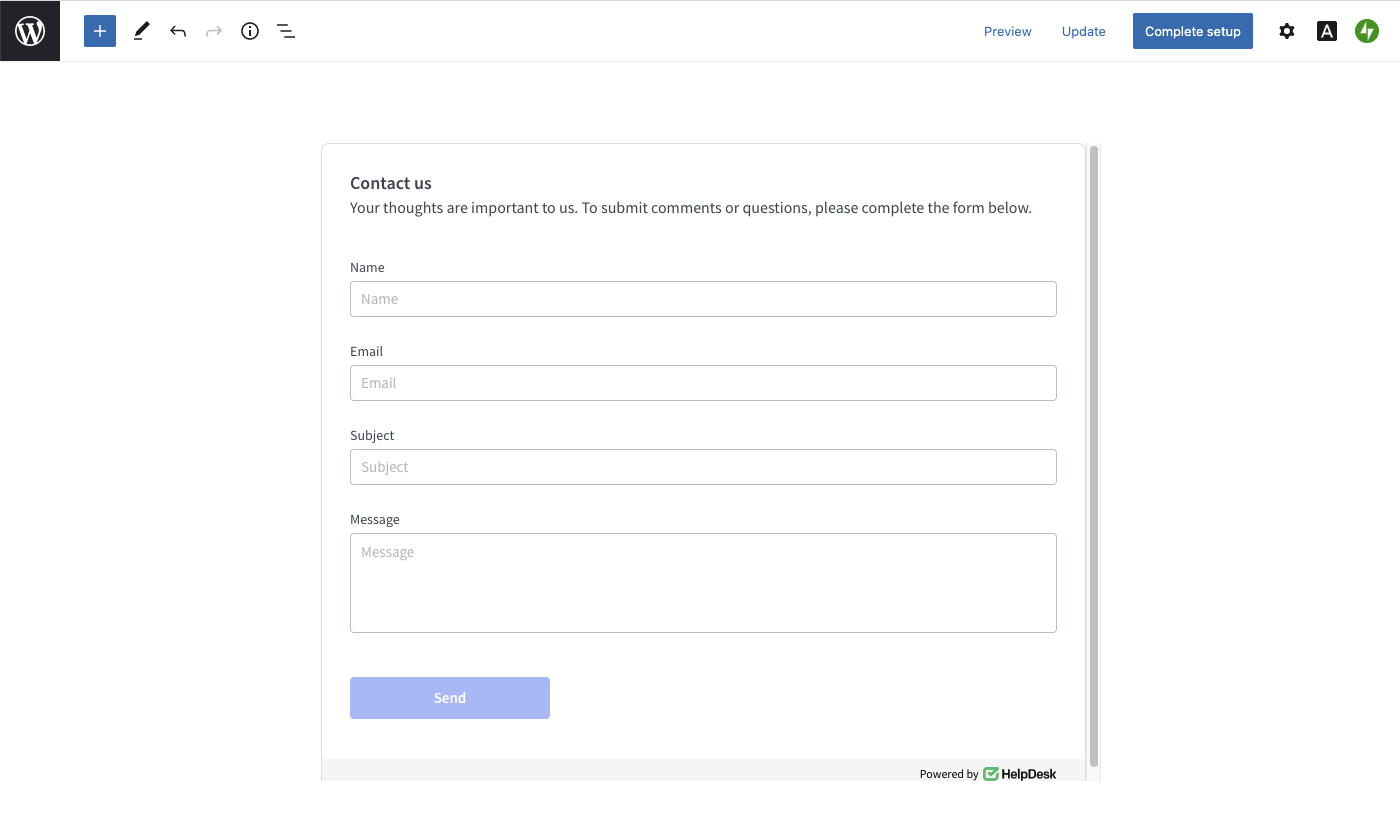
Click on the “Preview” button to see what the contact form will look like on your WordPress website.
Remember to save your changes.
What should you do when WordPress removes HTML iFrame tags?
Some versions of WordPress remove iFrame HTML tags to ensure a proper security level. If this happens to you, you’ll see the message, “Your browser does not allow embedded content.” The solution is the iFrame plugin, which allows you to get this feature through a WordPress webpage.
If your WordPress version blocks iFrame, use WordPress plugins to embed HTML.
This is the example of WordPress shortcode for the iFrame plugin:
[iframe src="link to your form" width="100%" height="638px" style="border: 0; overflow: hidden; overflow-x: auto;" sandbox="allow-scripts allow-popups"]
How many forms can you create?
You can create multiple contact forms for different teams. Just select the team and generate a new code to add it in a convenient place on your website.
Keep reading to see how you can revolutionize your website with effective contact forms.